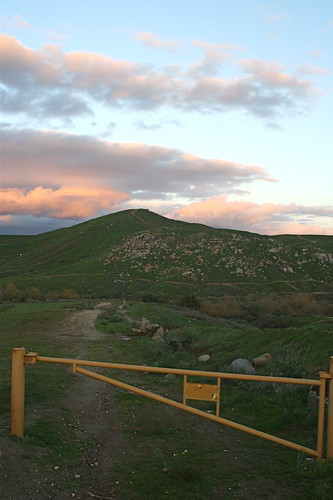
I had to really push the exposure on this one in iPhoto to get it to work. The sky and the landscape did not work well together. They can't. The sky is easily 2 to 3 stops brighter then the landscape. So this image is not the image that I wanted to take. The sky was darker then in this image. So either the exposure can be chosen for the sky or the landscape. I did not expose well enough for the landscape and had to subsequently correct the exposure for the landscape in iPhoto.
There are two possible solutions that I think that I could make work to solve the multi-exposure image problem. Before photoshop, ND, Neutral Density filters were the best solution. The filter would step down the light coming into the camera. If it was a graduated filter this would allow for a long enough exposure for the areas of the image that would need a longer exposure. If it is a graduated filter then the light step down could be targeted.
I want to get a graduated ND filter and a few other non-graduated ND filters so that I can work with the sky. Long exposures allow image capture that is different from a sports fast type setting. It can give water and ethereal quality. It can give the most shaded area a bright and full exposure. When it is graduated it can separate the comparably bright sky from the dark landscape. It is often to bright for the landscape when the sun is setting.
In the end, this worked out to be a nice shot, but it took a lot of tweaking. I realize that my tweaking and yours may not be the same, but I prefer to do very little tweaking. I don't even have photoshop right now. I just can't bring myself to drop the cash. I did buy photoshop elements 4, but it does not run well on an Intel mac. The update for the Elements version 6 is coming out soon. I know that you may be asking, what about 5? Adobe skipped it for the Mac and is finally releasing version 6. The prerelease reviews seem good. I may buy that. But what I really want is to really start to expand my skill set with some HDR shots.
That is where photoshop comes in. It offers the other solution, the HDR solution. What is done is an exposure is taken to properly expose for the sky and one is taken to properly expose for the landscape and then the two are combined to give one image that is properly exposed. Cost wise, the filter is better on the wallet. Quality wise, the photoshop solution can make a better image. In fact you can make your own graduated filter by exposing for all the elements in the image that are wanted and then combining them for one full image.
In this image, the sky was really darker, a lot darker, but in overexposing the sky to see the landscape the 'real' sky is not there. It is not as dramatically dark as it was with my eyes. So, we will see how it goes, maybe I will find a way to come up with enough to buy Photoshop CS3.
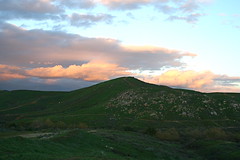
Here is an out take, same problem.
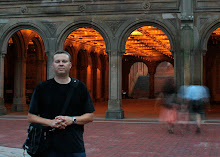
Here is an Image that I made at Zion National Park, I used a Cokin graduated tobacco filter and a graduated ND filter. I just bought some more Cokin filters to play a little with. More to come.

Thanks for looking.
EXIF Data,
Camera: Canon EOS Digital Rebel XTi Exposure: 0.033 sec (1/30) Aperture: f/8 Focal Length: 21 mm ISO Speed: 200 Exposure Bias: 0/3 EV
LOVE the Zions picture! and the others aren't half bad either. I wish there was a way for me to capture how beautiful everything is right now with the white mountains and green hills. Who says CA isn't the best place to live!!
ReplyDelete